Ant infestations may not be the worst pest problem you’ll encounter, but they’re still very annoying. Aside from the damage they could cause, ants could also bring unwanted bacteria to your household. Luckily, many ant baits are available to help you entrap and get rid of these pesky insects. When it comes to ant baits, you should consider making them rather than buying available products. Homemade natural ant baits better ensure safety during de-infestation, and they’re arguably more enticing for ants to eat (depending on how you make them).
But how do you make natural ant baits at home? As you’ll see below, homemade ant traps are simple enough to prepare, and the ingredients you’ll need can easily be bought from the nearest supermarket, pharmacy, and even online retailers.
5 Great Natural Ant Bait Recipes to Try Out
Below are some of the best natural ant killer recipes that’ll help you battle ant infestations in your home. Each of these is effective against different ant variants, including carpenter ants, fire ants, pavement ants, and others.
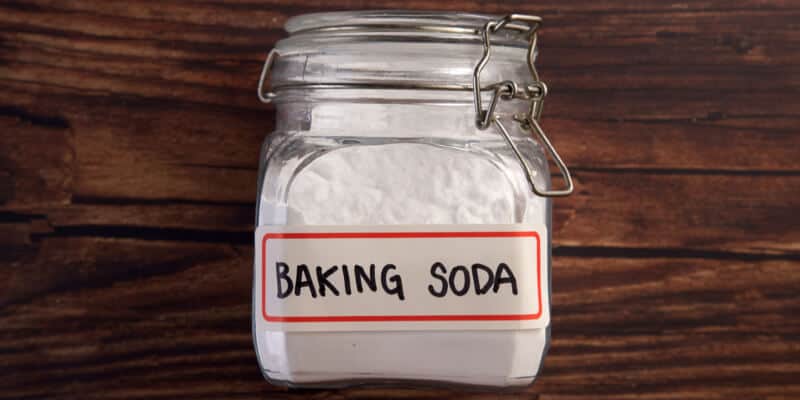
Natural Ant Bait Recipe # 1: Baking Soda and Corn Syrup
Since ants are attracted to sweet stuff, you can use this recipe to lure them.
Ingredients
1 tablespoon baking soda
¼ cup corn syrup
1 sheet waxed paper
Procedure
Mix the baking soda and corn syrup in a small bowl. Stir well to combine.
Place a few drops of the mixture on the sheet of waxed paper.
Cut the waxed paper into small, thin strips.
Place the strips at any areas where you’ve spotted ant activity.
Add a few drops daily until the sugar ants are all gone.
Alternatively, you can use other sweet liquid ingredients in case corn syrups aren’t available. Top choices include maple syrups, honey, and even sugar solutions.
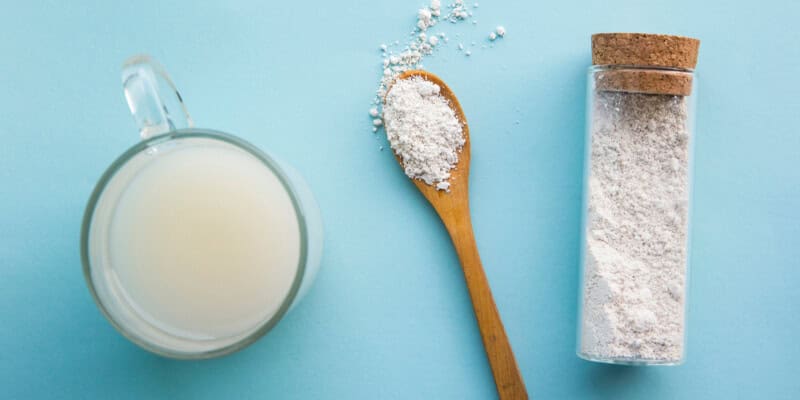
Natural Ant Bait Recipe # 2: Diatomaceous Earth
If you prefer something safer, cheaper, and more environment-friendly, try making ant baits using diatomaceous earth. Made from crushed fossilized diatom skeletons and algae, this substance will greatly aid you when dealing with ant infestations.
Ingredients
1 cup sugar
2 teaspoons food-grade diatomaceous earth
3 cups water
6 small screw-top jars with lids
Masking tape
Procedure
Cover the jars with masking tape so the ants can climb up their sides.
Mix the sugar, water, and diatomaceous earth in a bowl.
Pour the mixture into the jars.
Place the jars near the ant infestation spot.
Make sure to use only food-grade diatomaceous earth as its industrial counterparts contain chemicals that can be hazardous to your health.
Natural Ant Bait Recipe # 3: Sugar, Lard, and Baking Soda
In case the ants invading your home are drawn to greasy substances, you can try baiting them with a crumbly mixture of shortened baking soda.
Ingredients
1 tablespoon baking soda
1 tablespoon powdered sugar
1 to 2 teaspoons lard
1 sheet waxed paper
Procedure
Place the baking soda and sugar in a small bowl.
Using a mixer, blend the baking soda and sugar while gradually adding the lard. Whisk until the mixture becomes crumbly.
Spread the mixture on the sheet of waxed paper.
Cut the waxed paper into small, thin strips.
Place some of the strips at any areas where you’ve spotted ant activity. Store the rest in a small sealed container.
Replace the strips every day.
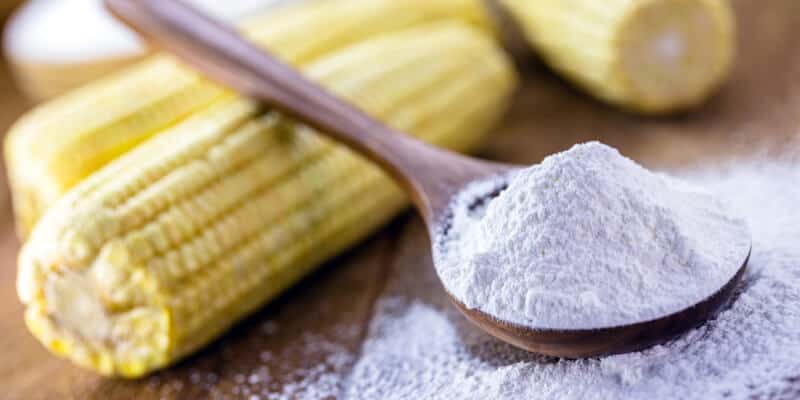
Natural Ant Bait Recipe # 4: Cornstarch and Water
While cornstarch isn’t poisonous to ants, it can still help you entrap them long enough for you to dispose of later.
Ingredients
1 cup cornstarch
1 to 2 cups water
1 sheet waxed paper
Procedure
Mix the cornstarch and water in a bowl until the consistency becomes cement-like.
Spread the solution over the sheet of waxed paper.
Cut the waxed paper into small, thin strips.
Place the strips near the infested area.
Additionally, you can also simply sprinkle the infested area with cornstarch. The moisture that comes from the anthill will make it sticky enough to trap the ants.
Natural Ant Bait Recipe # 5: Peanut Butter and Baking Soda
Lastly, you can entrap ants using baking soda and peanut butter. The peanut butter does the baiting, while the baking soda does the dirtier task.
Ingredients
1 tablespoon peanut butter
1 tablespoon baking soda
1 cup water
Procedure
Combine the peanut butter and baking soda in a small bowl until the mixture becomes clumpy. Sprinkle it with water whenever needed.
Place clumps of the mixture near the ant colony. Make sure you place them on top of waxed paper to minimize mess.
Replace these clumps as needed.
In case peanut butter isn’t available, you can substitute it with bacon grease.
Why Make Your Own Natural Ant Baits?
With so many ready-made ant baits out in the market, you might be wondering why you should bother with making your own in the first place. Below are a few good reasons why you should:
1. To choose its ingredients
The beauty of making your own ant bait is that you get to choose which ingredients to put in the mix. This allows you to choose safe, natural ingredients like baking soda, cornstarch, and whatnot.
2. To control its strength
Even the best ready-made ant baits aren’t as effective as advertised. By choosing to make your own, you get to control the strength of the ant traps. This allows you to more effectively deal with ant infestations in your home, and it allows you to get your money’s worth.
3. To maximize de-infestation results
Store-bought ant traps typically contain processed ingredients, preservatives, and chemicals. These tend to poison ants quickly, which somewhat undermines their ability to reach the rest of the colony (you need the ants to bring the bait in for it to do its job). By opting to make your own, you can avoid such roadblocks.
4. To keep children and pets safe
At the same time, the borax, boric acid, and other chemicals found in pre-made ant baits can be harmful if ingested or if they somehow get in the eyes. By using them instead of homemade ant traps, you put your children and pets in harm’s way. Sure, you can place them somewhere out of reach, but accidents could still happen. To be completely safe, best choose homemade ant baits.
Making your own natural ant baits is cost-effective compared to buying finished products. Opting for the latter can still get expensive despite the many affordable ant killers in the market. Aside from dealing with the cost compounding gradually, you also need to buy different products for specific target areas, and this will blow your budget quite quickly. So reduce your expenses and make your own ant traps instead.
6. To enjoy better air quality
Pre-made ant baits usually contain chemicals that emit volatile organic compounds. These VOCs can mess up the atmosphere in your home, leaving you, your family, and pets with poor air quality. By using homemade ant baits, you can stop polluting your home, which will eventually help improve air quality.
7. To avoid triggering your asthma
If you’re struggling with asthma or allergies, then homemade ant baits allow you to de-infest your home without triggering your condition. As mentioned above, ready-made ant traps contain VOCs that can pollute the air in your home (because of the strong smell they give off). These can easily set off your breathing problems. With a homemade ant trap, you won’t experience any of these inconveniences.
8. To be environment-friendly
Lastly, homemade ant traps don’t threaten the environment since they don’t emit any VOCs. Homemade natural ant baits are mostly biodegradable, and they can be safely disposed of once you’re done with the ant de-infestation. By choosing them over chemical or synthetic ant traps, you can help keep our planet clean and livable.
Great Tips to Follow When Using Natural Ant Baits
For your homemade ant bait to be truly effective, you need to ensure that the ants find the bait, carry some of it back to their colony, and entice their fellow ants to collect the bait. With these in mind, you can follow these tips that’ll help you effectively use your ant baits to deal with any ant invasion:
1. Locate the infested areas first
Before you even begin making the ant bait, you first need to pinpoint where the ants have made their colony. Look for any signs of ant infestation, including ant corpses, ant trails, and dirt piles. Only after you know where they are should you proceed with making the ant lures.
2. Thoroughly inspect the infested site
Next, you need to properly appraise the situation and inspect the ant-infested areas. Do the routine practiced by pest control professionals, including switching on all the utilities, cleaning the area around the target site, and many others. Or you can have your trusted pest exterminator do it in case you don’t have time to do so yourself.
3. Place the bait properly and strategically
Once you’ve located the ant nests, inspected the site, and finished making the baits, you can proceed with springing them. When placing ant lures, you need to make sure they’re positioned strategically, preferably as close to the ant colony as possible. That is, it should be near enough so the ants can smell it. You should avoid placing the bait on countertops (where food is prepared) or in areas where it can easily get wet. Be sure to keep the bait out of reach of children and pets as well.
4. Control the amount of bait used
While you need to make sure enough bait is placed during the de-infestation, that doesn’t mean you shouldn’t spend it wisely. As a rule of thumb, place more homemade ant baits in larger infestation areas, while using them more sparingly at smaller target spots. For best results, leave the ant bait for at least three days and replace them whenever needed.
5. Keep the surrounding area sanitized
Homemade ant killers work best when nothing is distracting your targets from it, so make sure to keep the area around the ant colony clean. Sweep away the dirt surrounding it, remove the clutter from the room, and make sure there’s no food other than the bait.
6. Check the bait regularly
Even the best homemade ant baits have limited shelf lives. They’ll start aging as soon as you place them near the infestation site. Factors like temperature, sunlight, and climate will also cause them to become inedible for ants over time. So make sure to check up on your traps regularly and replace those that have been rendered useless by the elements.
Enjoy an Ant-Free Home With Positive Pest Management
Ants may not annoy you as much as termites or other insects do, but you still need to get rid of them as soon as they come invading your house. Homemade natural ant baits will help you get the upper hand against these small but terrible creatures. With them at hand, you’ll gradually kick those pesky ants out of your beloved home.
Looking for a professional ant exterminator? Positive Pest Management offers quality pest control in New York City and Nassau County, Long Island. With our team of experts, we can easily help you deal with any ant problems, and we guarantee quality work.
Interested in our pest control services? Give us a call to get a quote.